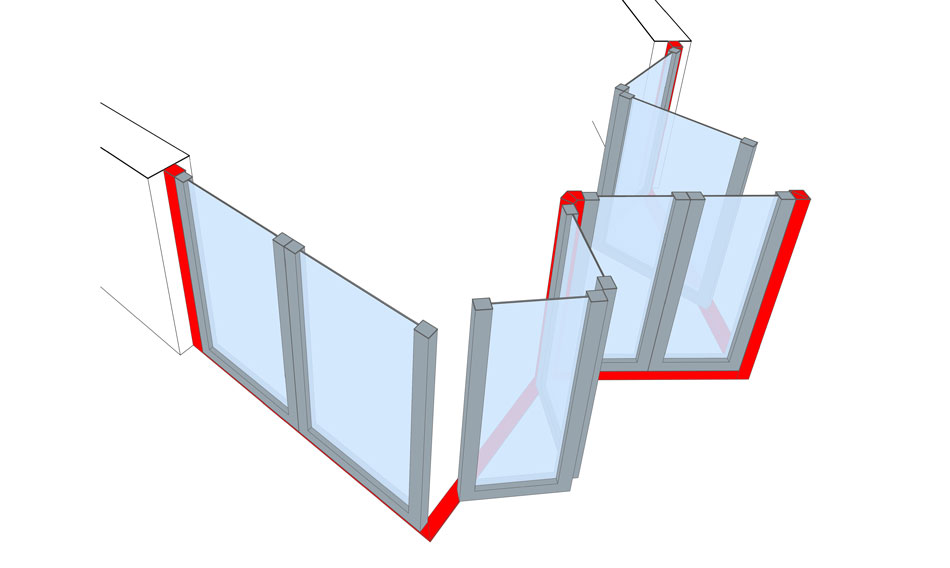
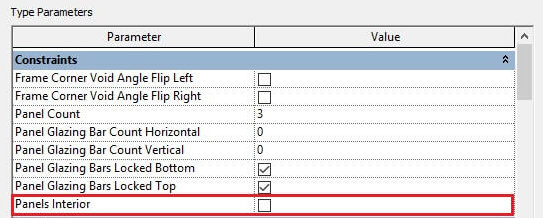
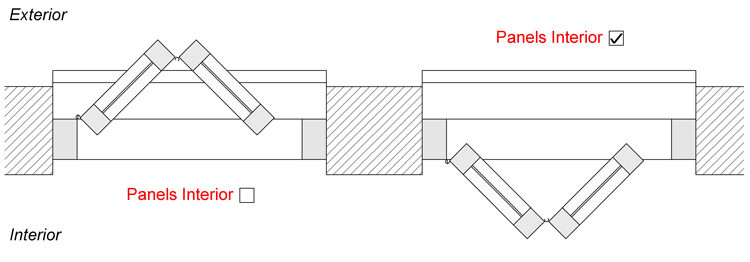
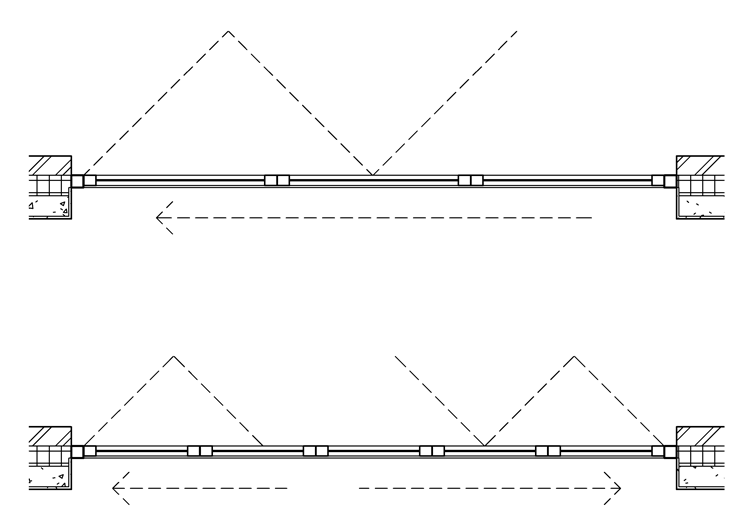
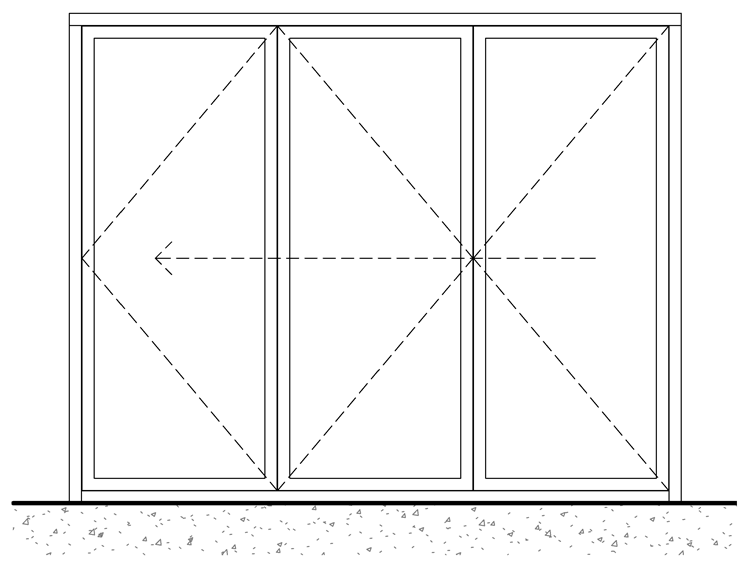
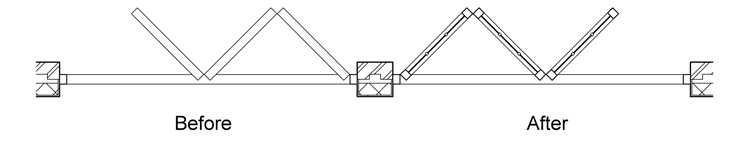
Switch panel folding side
Previously, panels only folded outwards (exterior), which was very limiting. The only workaround was to flip the entire door, which was of course all but ideal when using the threshold and exterior ramp option. Now it's just one parameter to change the folding side.
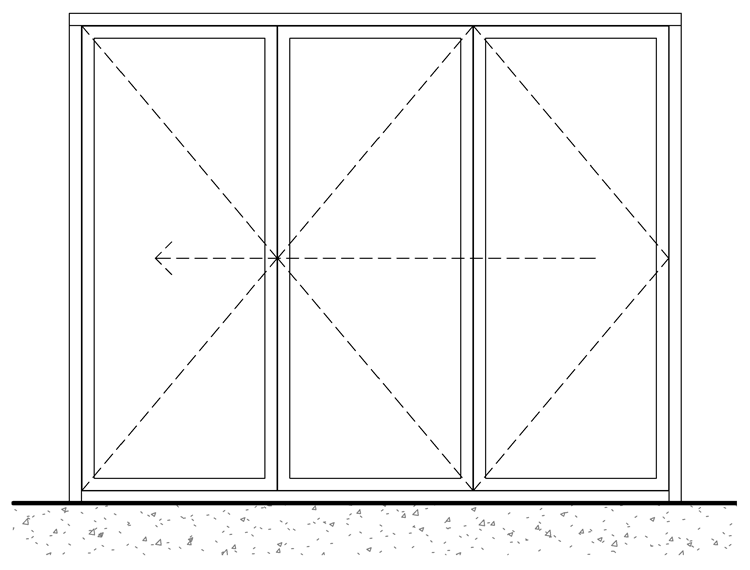
Just one panel
The bi-fold door families allow for a flexible number of panels which was previously limited with min. 2 and max. 10 panels per side. With this update, we remove the min. limit. allowing single panel setups like the following example...

Detail levels
When we released the new bi-fold door collection we made some choices for the detail level graphics that causes issues for many of our customers, as they do lots of their work in coarse more, which didn't show enough details. That ultimately resulted in lots of support emails, asking how to show the panel frames. With this release we have changed the graphics for each detail level. Following the before and after for each detail level to demonstrate the changes.
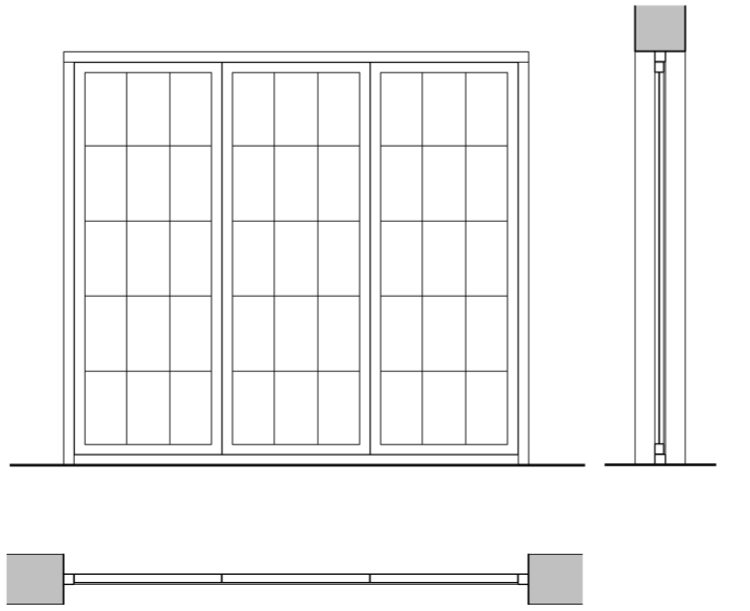
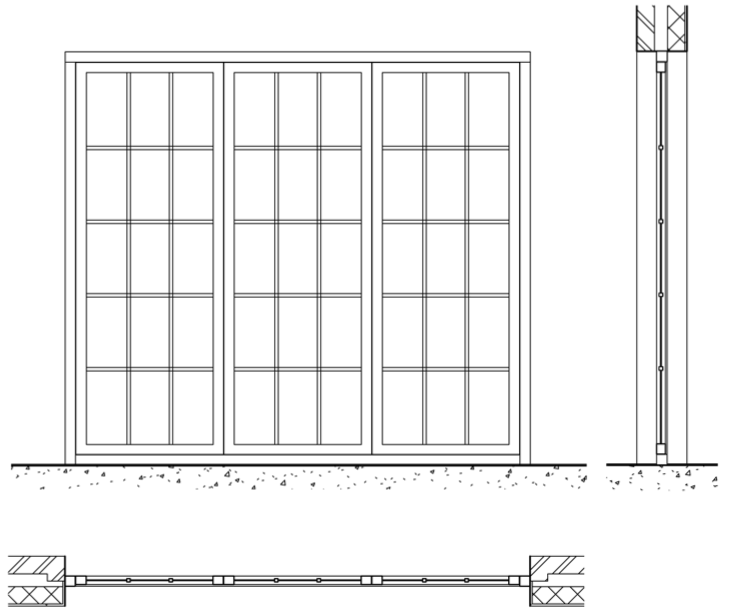
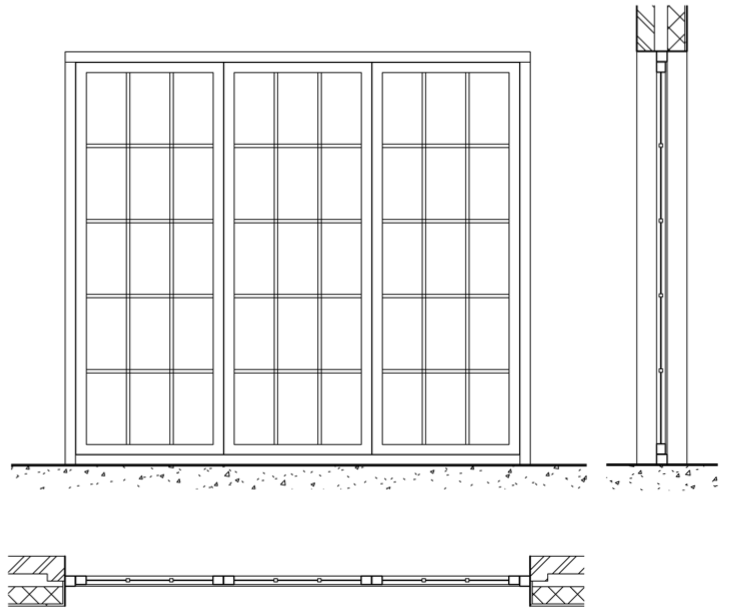
Coarse - Before
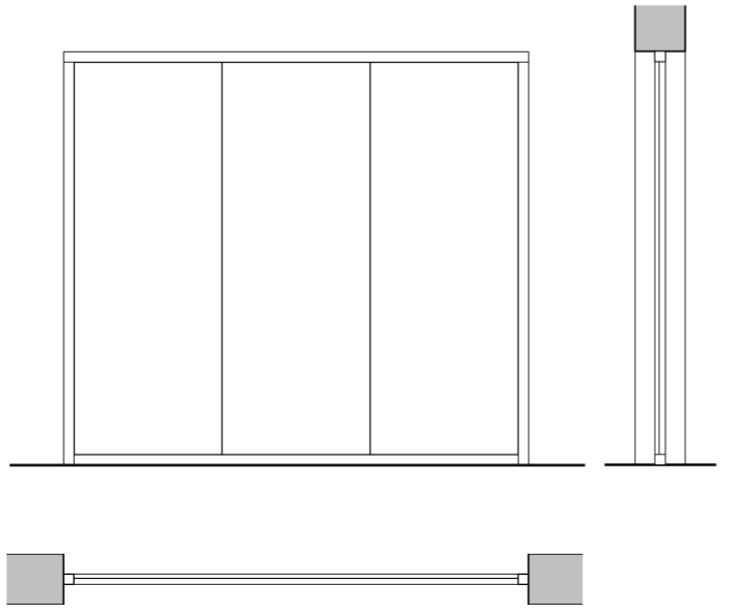
Coarse - After
Medium - Before
Medium - After
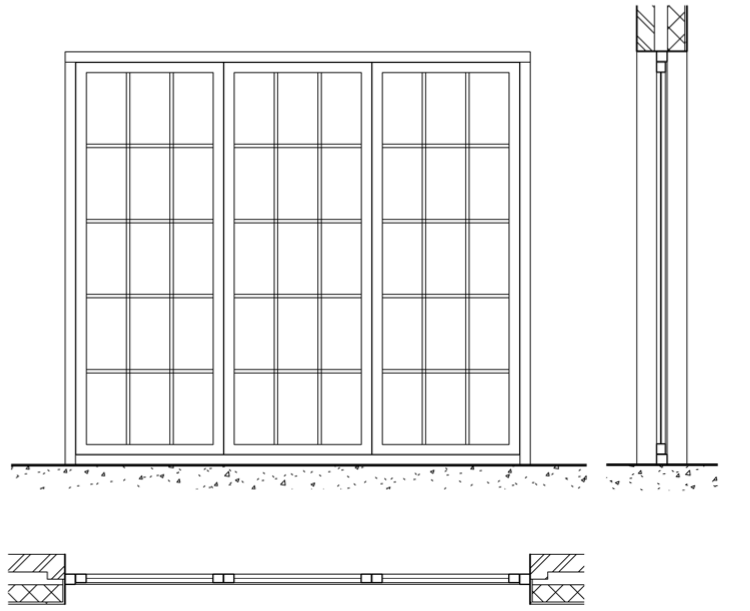
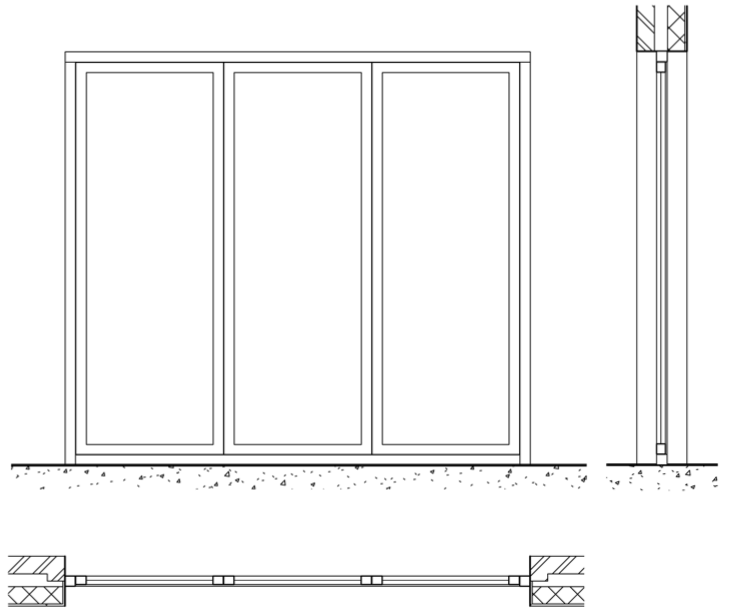
Fine - Before
Fine - After
Symbol lines
When we initially released this new collection of bi-fold door families, we decided to not include symbol lines all together, as they needed more consideration in terms of localization and performance which we wouldn't want to rush.
Localization
One of the differences for symbol lines in various countries is the direction the symbol lines are shown in elevation. This difference in standards is supported via a new type parameter that allows you to set the symbol lines in elevation to your preferred standard.

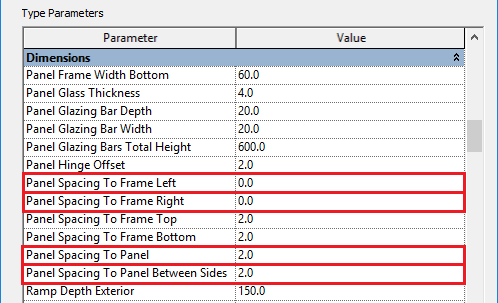
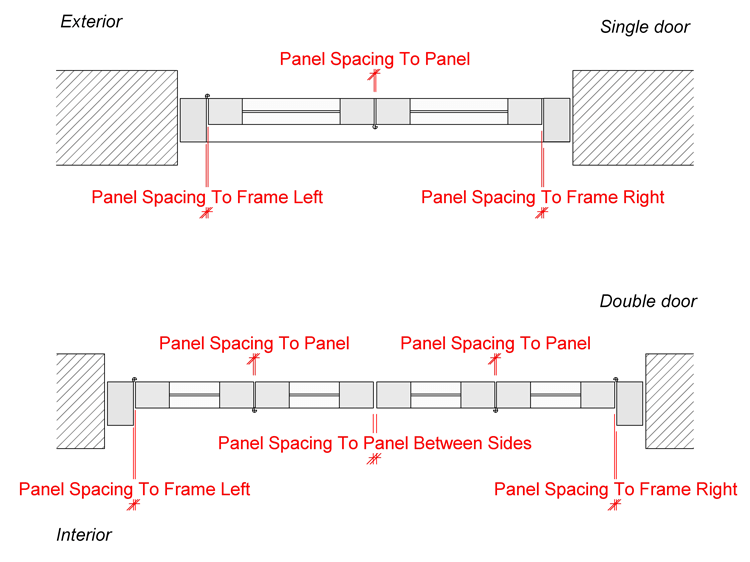
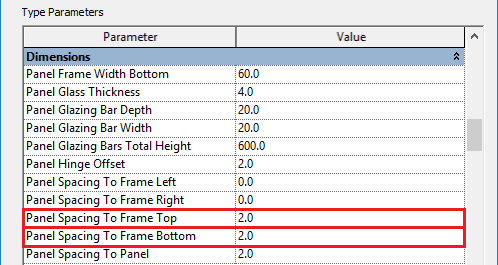
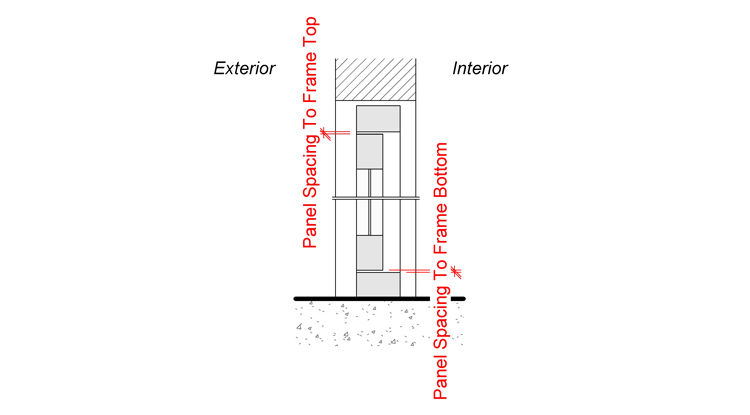
Panel spacing
Previously there was just one single parameter setting all spacing around each panel as we thought that this would be sufficient. However we got feedback that it would be helpful to control spacing separately, which would not just help to get accurate panel sizes but also result in more accurate scheduling for glass area, etc.
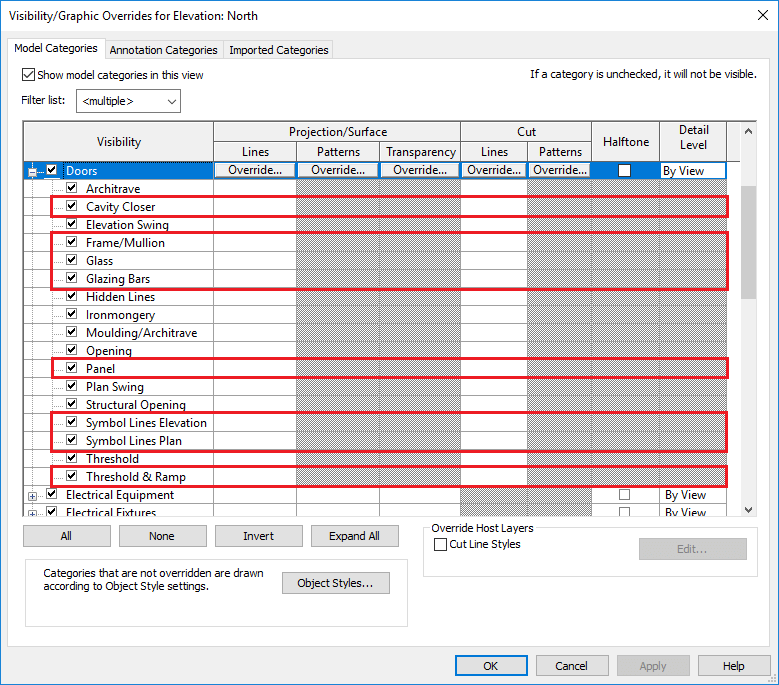
Visibility/Graphics subcategories
With this version we add better support for subcategories to control view / detail level based visibility and graphics via the Revit Visibility/Graphics settings. The visibility of the new symbol lines is now also controlled via the Revit Visibility/Graphics settings rather than family parameters.
Schedule
Previously the family included the parameter Calculate Glass Area to enable the calculation for the schedule parameters Glass Area With Glazing Bar and Glass Area Without Glazing Bar. With this update, the parameter Calculate Glass Area has been removed and the calculation happens automatically depending on the selected panel type.
We've also fixed the calculation for Opening Area, Glass Area With Glazing Bar and Glass Area Without Glazing Bar which didn't take spacing into account.
Other Fixes & Improvements
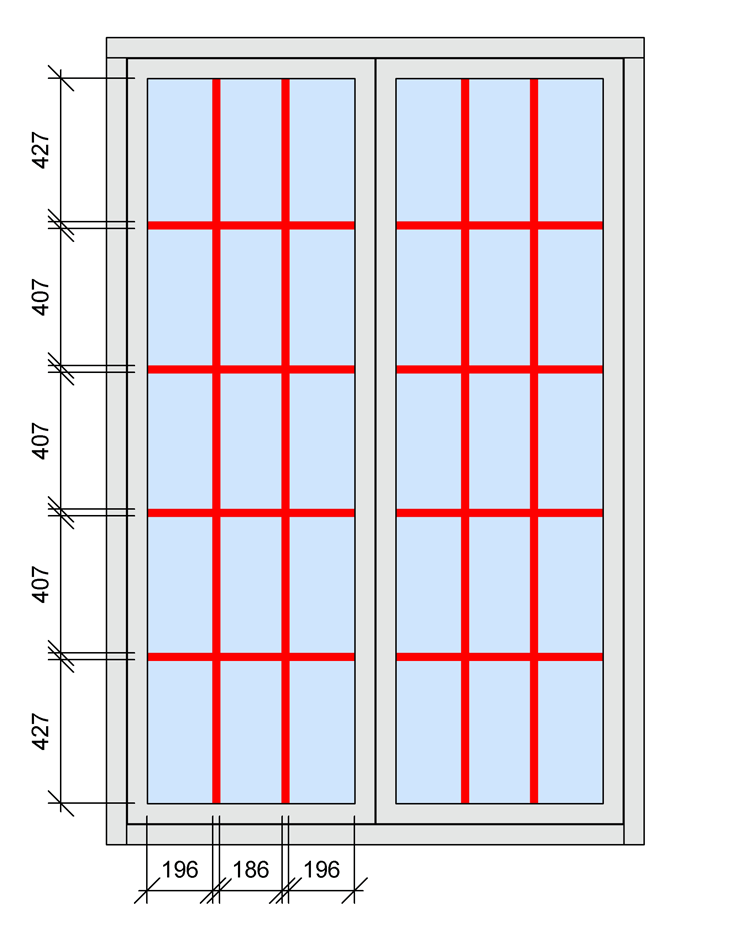
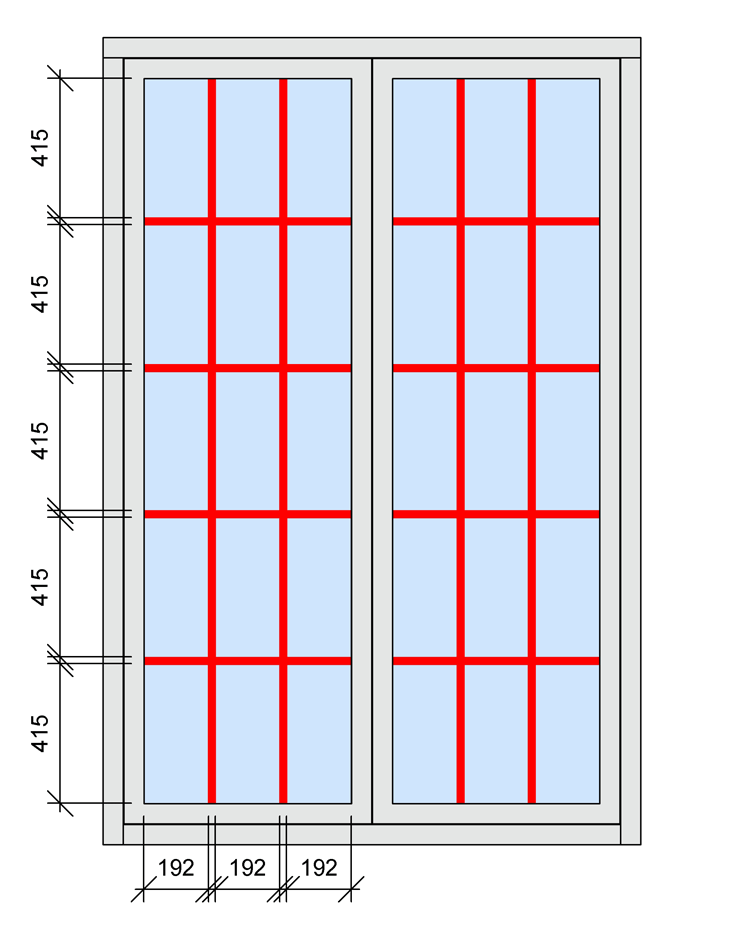
Glazing bar positioning in frame panel
We've fixed an issue where the glazing bars would't be distributed correctly, resulting in non equal glass areas.
Images showing before (left) and after (right).
Glass visibility
We've fixed an issue where the glass wouldn't show in certain scenarios depending on door height and positioning.
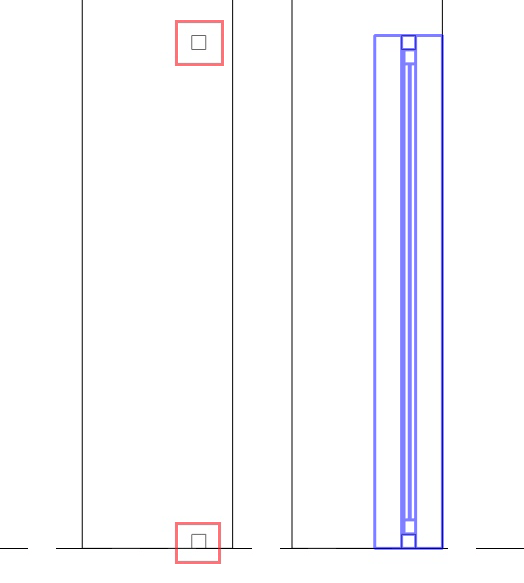
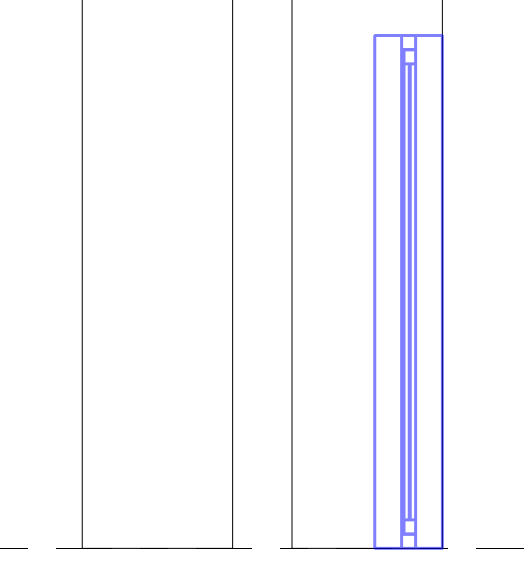
Frame visibility in side elevation
We've fixed an issue where a frame geometry would show up displaced in elevations 90 degrees to the placed bi-fold door family.
Images showing before (left) and after (right).
Selection issue when clicking nearby but not directly on door
We've fixed an issue where the door would be selected when clicking outside the actual door area, being super annoying when selecting some other elements while being zoomed out.
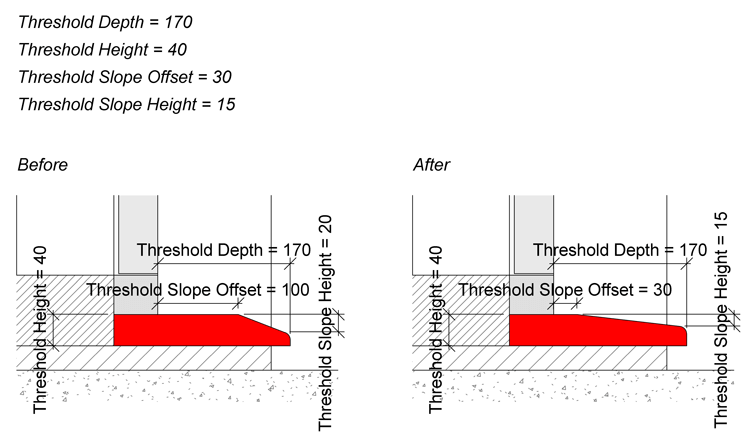
Associated parameters for threshold
We've fixed an issue where the parameters Threshold Slope Offset and Threshold Slop Height would be not applied correctly. You can see the result of setting these parameters in the following before (left) and after (right) comparison.